Here is my version of pin stitch lesson. I've used photos as a tutorial here. There are a few reasons to use the pin stitch. Many people use it to finish when there are only a few stitches in an area because you can finish like this very close to where you are ending, some people even can do it in the same stitch that you finished on.
Another reason to use this finish and the reason that I use this finish. It is so you don't have to flip over the piece. I can leave it on the stitching stand and continually stitch.
It also allows your stitching to be clean all the time. The other ways of finishing on the front leaves little strings to snip later, while with this it's really clean and you don't have to think of that string again once complete.
This isn't the way a pin stitch finish is taught in other tutorials. I've changed it and this is how I do it. I prefer it this way.
First off let me show you a section of my Aida.
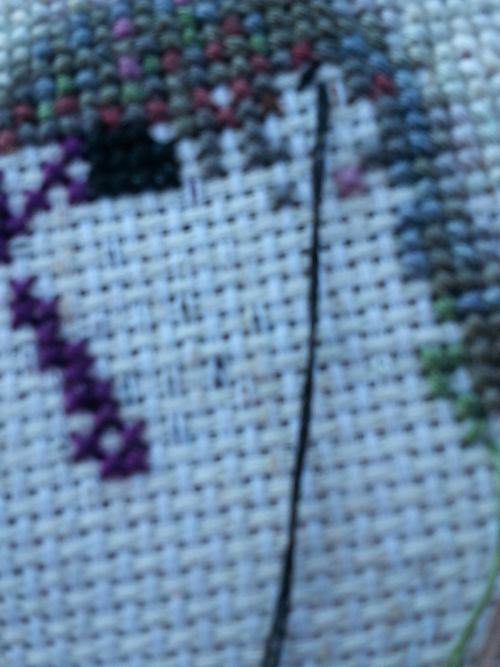
Ok, so that looks a little blurry, but pretty normal right?
Here is the same image, but the pin stitch finishes pointed out. This is a place where there are a lot of them because there is an eye above it, so it has them sort of compressed in there.

I just wanted you to see that I use this stitch extensively. After I've completed the stitch... I continue stitching without any regards to these being there. I will show you this whole area stitched over at the bottom of this tutorial.
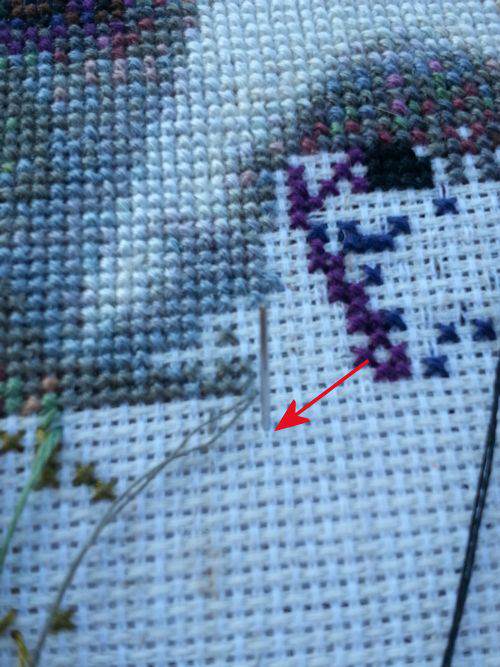
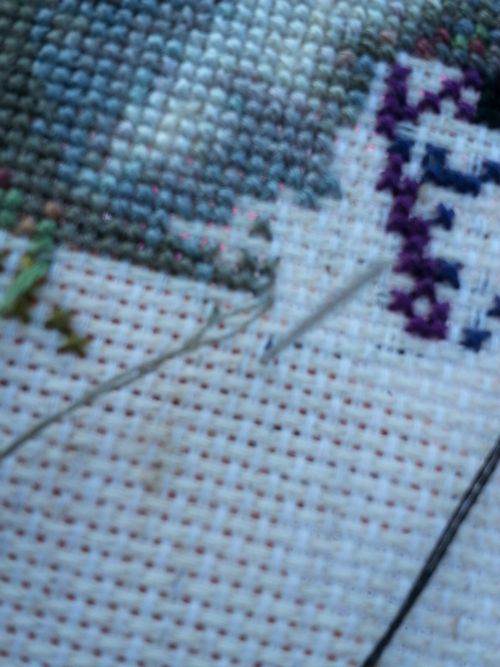
I have a string now that I'm ready to finish off. It will be just a bit away from this area. Here is an image of my needle coming up.
You watch the weave of the Aida and make sure you are on the top side of the weave, so that the pin stitch will blend into the weave. The first up string comes between the center of the edge of a standard hole. You can see where my needle is coming up in this image.
Then you go down, just two threads away in a straight line with the weave.
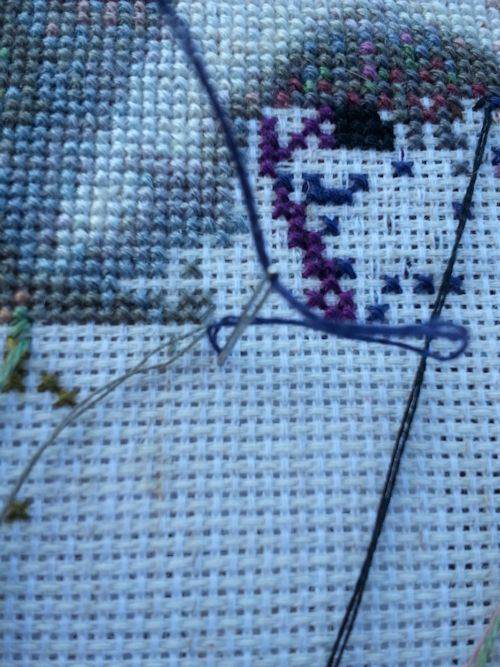
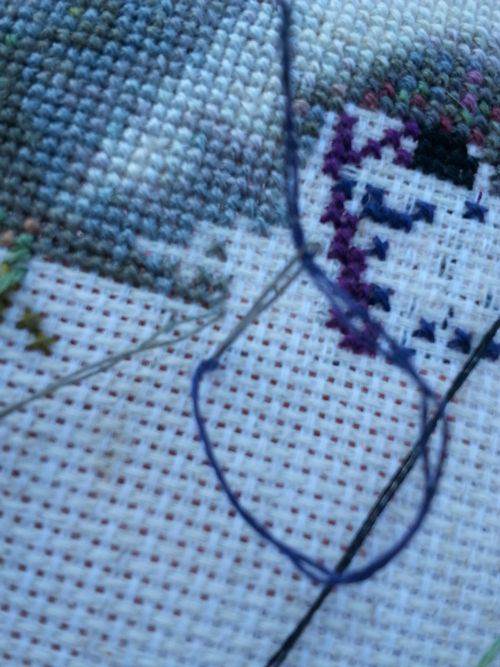
Now give this a yank... not ripping your cloth, but make it really tight. Here is this one after tightened.
That is 1/2 of the pin stitch. The next half goes exactly the same, but the opposite direction.
You then come up the other side of the same top weave, but from the other side.
You go down the same place that you went down the first time.
Now, I didn't take a picture of what it looks like with this tight. You just pull it tight though and then it's almost done. You have two options from here, you can turn it over and snip it.
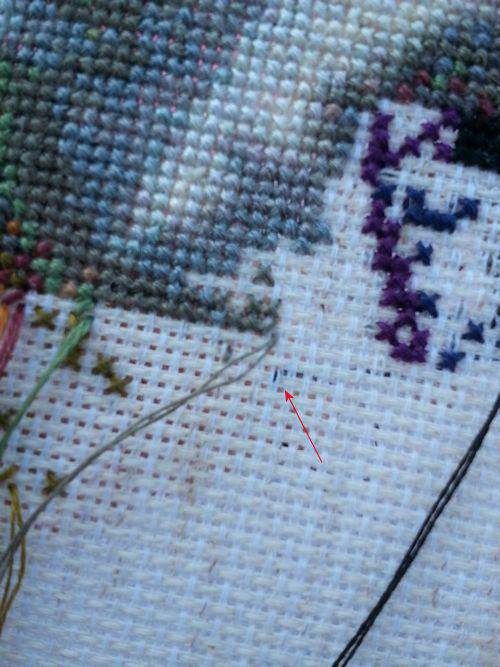
But... what I do is a pull the needle back up through one of the standard stitching holes right beside my pin stitch. I pull my Aida really tight and snip really close. I find that just the give in the Aida gets the tiny tail to go in the back. Here is the back after this stitch was snipped.

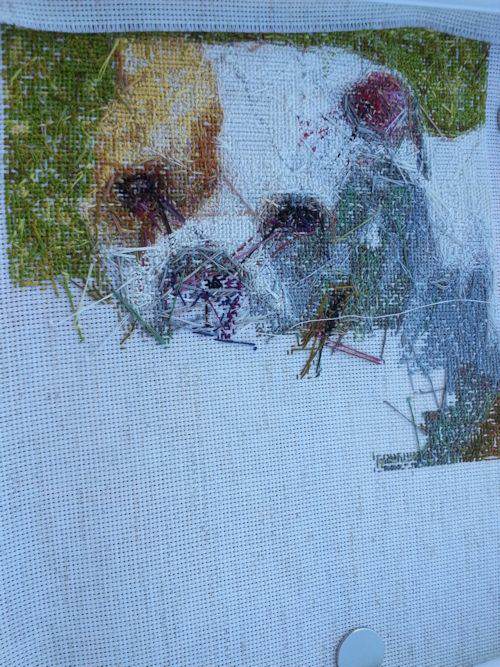
So, now remember up top when I showed you all those stitches, where there was a lot of them. The first pictures in this tutorial. I'm going to show you my back now, so you can see all the strings and how busy it is in that area.

Ok, so that looks like a mess right. This pattern is of my dog though, and I'm going to show you the backside of my stitching with a more distant image. I think you'll agree you can see the dog and it doesn't look very chaotic.
OK, last one... If you ask me on Facebook. I'll show you the front of this project. It's a gift I'm not ready to reveal yet publicly on my site. You are looking at the nose section though there where those tight stitches are.... and here is the backside of that area all stitched over, so you can see how the pin stitches are buried both front and back.
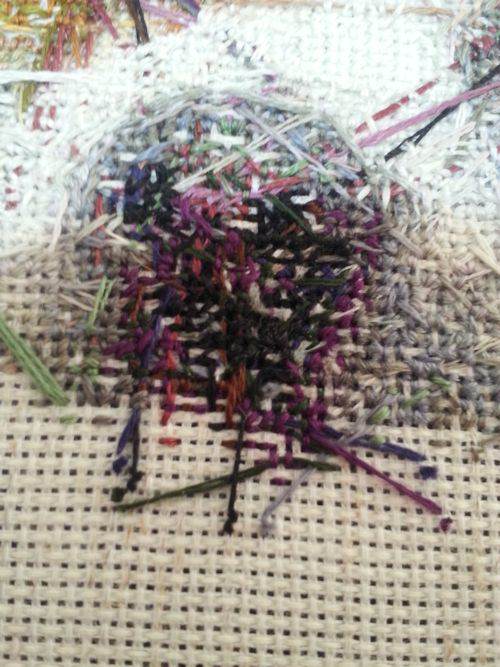
Ok, so you can see the other stitches have covered all those other pin stitches. You can see new ones obviously... I use the pin stitch all the way until I'm almost done with a project. I switch over to pushing my needle behind stitches at that point.
Here is what this project looks like completed as well.
This is a modified pin stitch though in the "true" pin stitch. You can finish only like a stitch away from where you are ending. I have changed it by moving it further away from my final stitching point with it. I like to see it moved about 10 stitches, but I'm overly cautious. You may be comfortable with it being closer / shorter.