Parking your threads in cross stitch is a technique where you leave your unfinished strings hanging on the front of your project. It is a technique that can be done many different ways, so this is my version. I recommend you do whatever feels best for you. This technique is also very uncomfortable for some people and if that is you there is no requirement that you do it this way. I highly recommend you try it though and give it a fair shake as it does take a little bit of adjustment to stitch this technique. I personally am not looking back and will more than likely even stitch my smallest projects with this technique. I like how you can watch your piece just come to life one row at a time.
Supplies for Cross Stitching
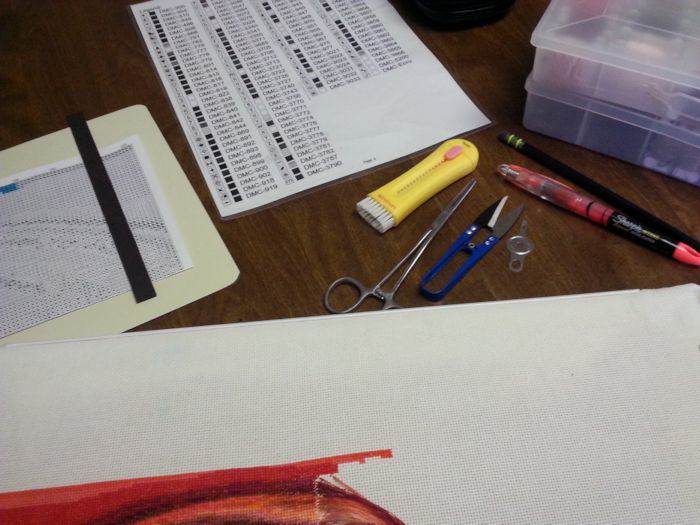
My first image here, you can see my stitching at bottom, my cases of floss ready, my color guide, my pattern, highlighter, pencil, eraser, needle threader, hemistats, scissors, and needle. This is my basic set up to get ready to stitch. I usually stitch on my couch, but for this tutorial, I took it to the kitchen table.
Pattern Before
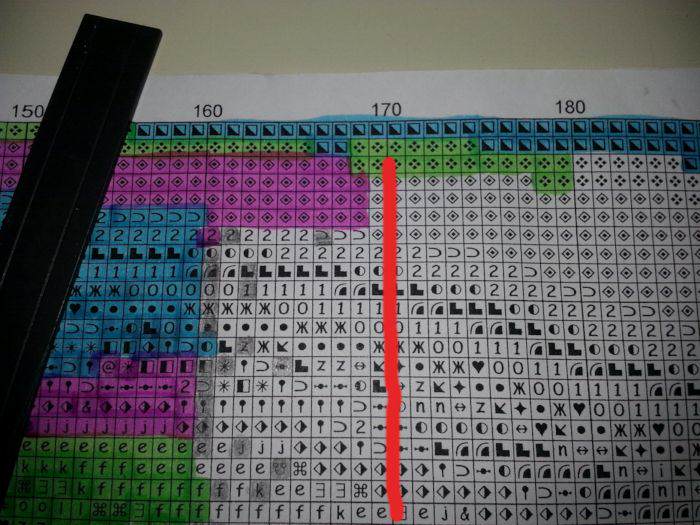
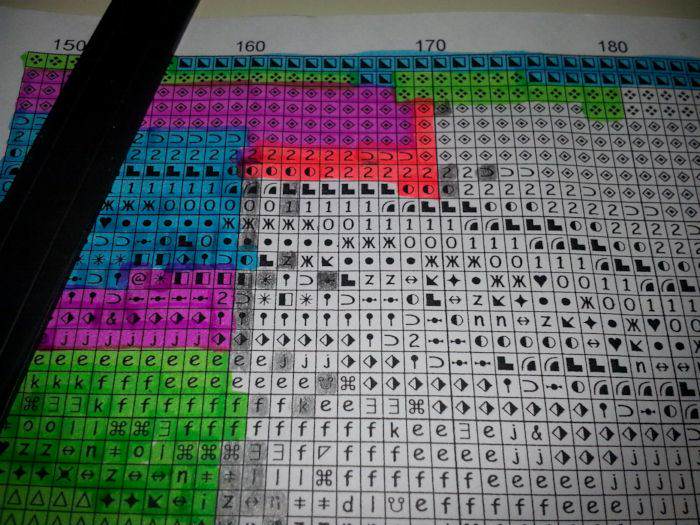
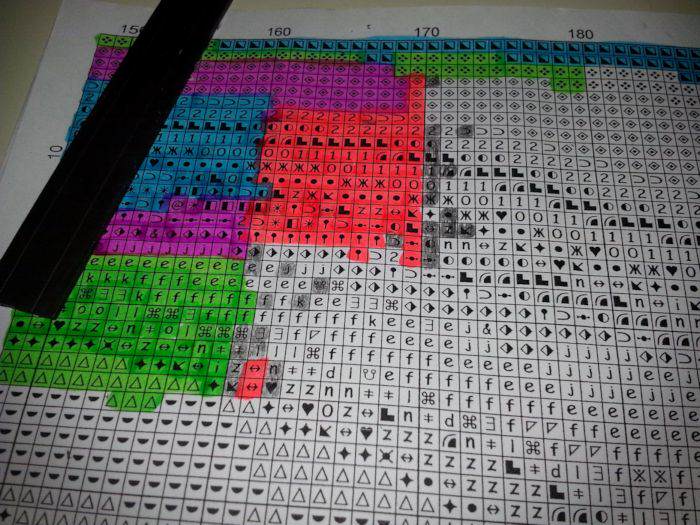
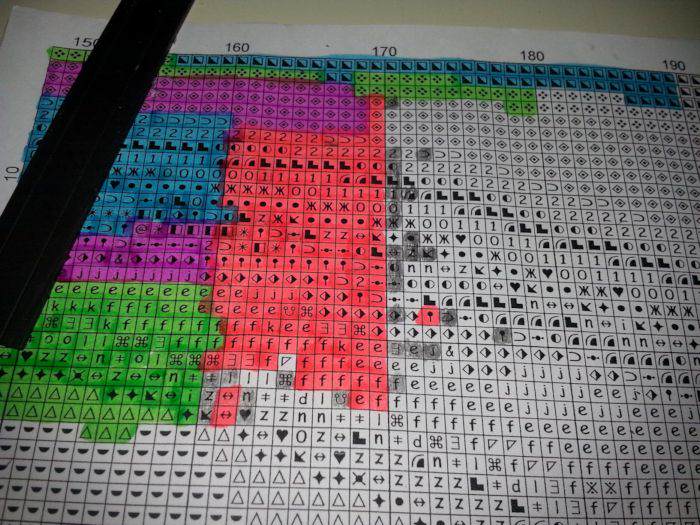
Here is my pattern before, this session. I marked the 170 line, which is going to be where we are stitching to and working down. You can see the pencil marked squares which is where a string is already parked. I have about 40 strings parked on this piece before we are starting. The highlighted squares are stitched, no matter the color. I use a different color each time I stitch except yellow. I mark the black stitches with yellow.
First Stitches Marked
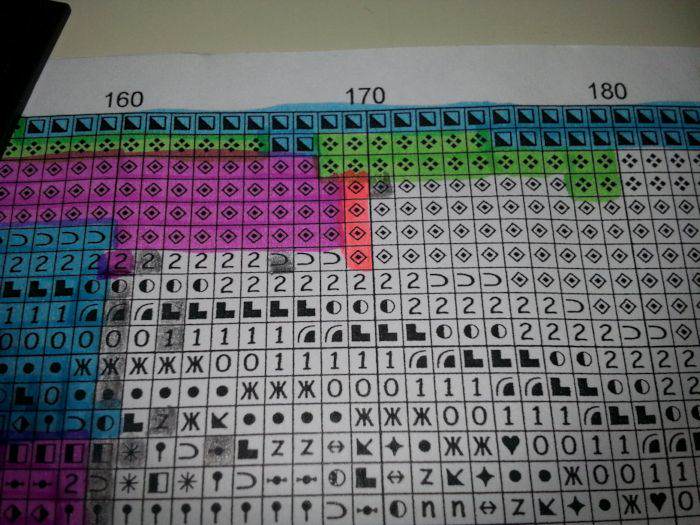
Here you can see in the pink highlighter my first stitches. I started a new thread and parked it at the top of the next column as my first stitches.
Stitching Before
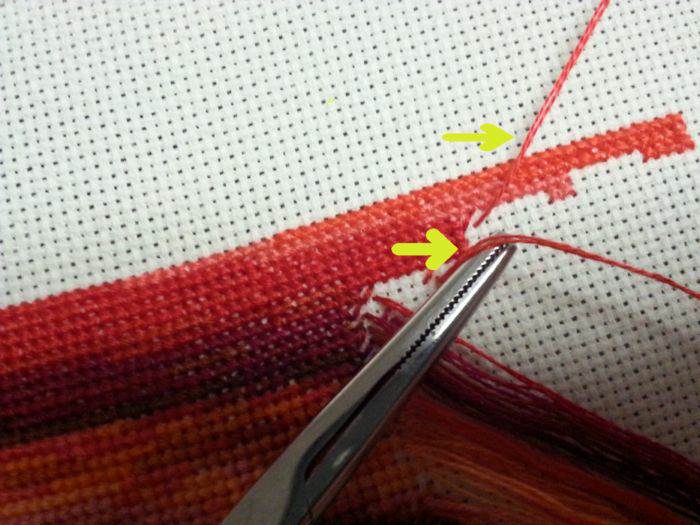
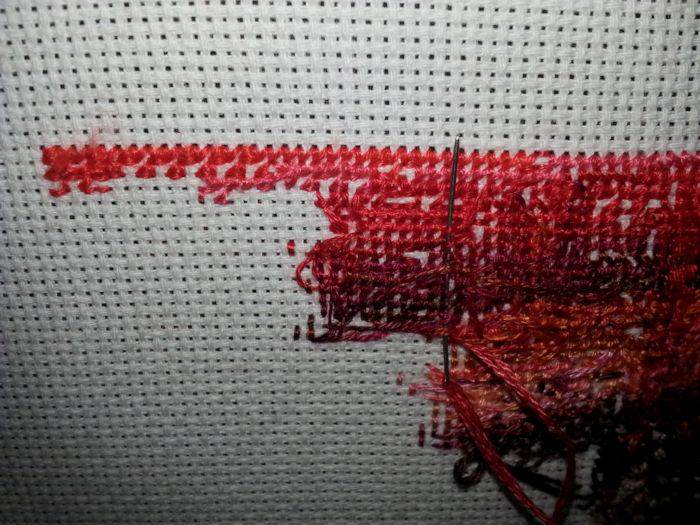
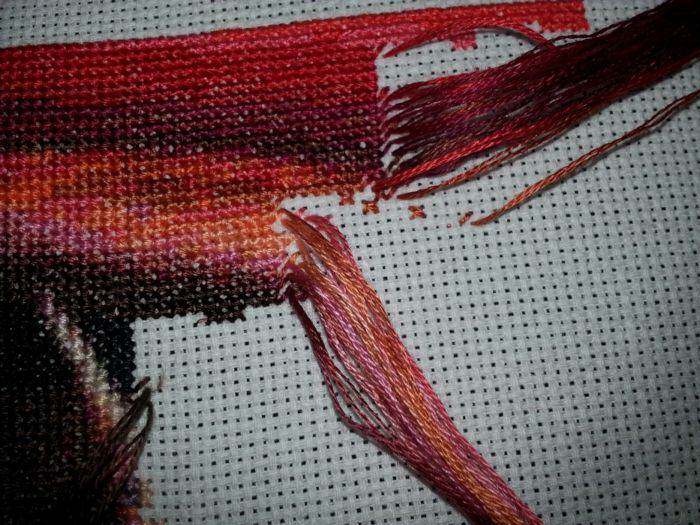
Here is my stitching, I’ve stitched 4 stitches and parked the top string. The next string that I’m working with is the bottom arrow with the hemistats. This string is already parked from last time I worked. I simply thread it and finish that first stitch. I leave my parked strings 3/4 finished, so they only have the last down movement and the cross will be done.
First Parked Thread
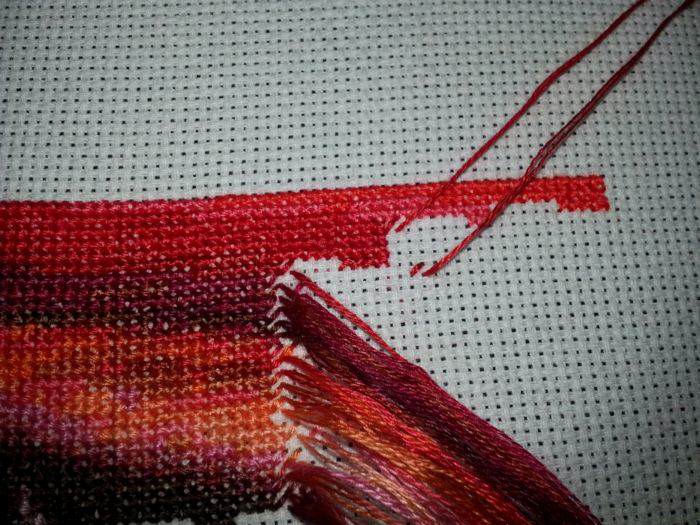
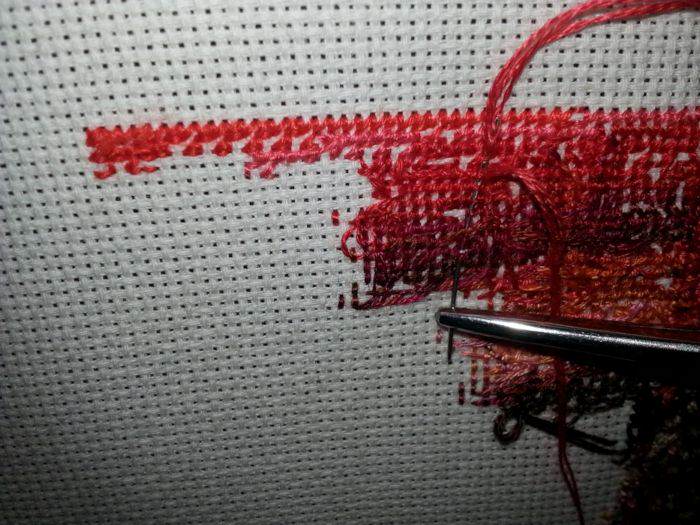
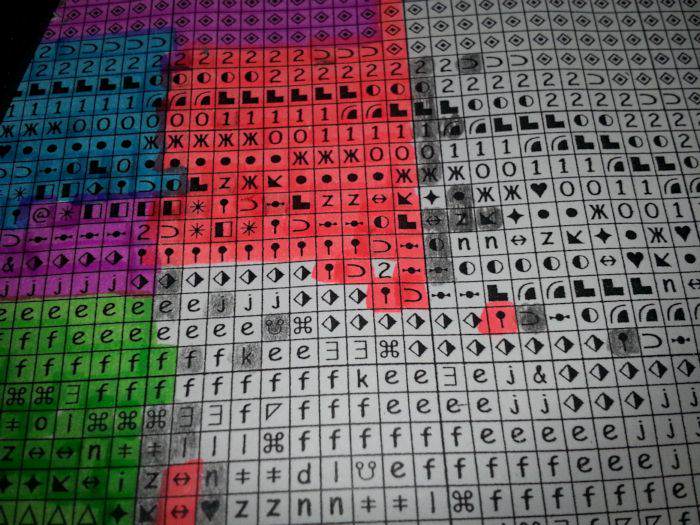
In this image you can see that top, parked thread still there. I’ve then parked the bottom thread after stitching the few stitches that I needed. This is stitching everything up to that 170 line that I highlighted in the pattern image above. I then park the thread in the first stitch in the 180 section that I will do next. This pattern is nice for this now because the colors are moving towards the right.
Parked Markings
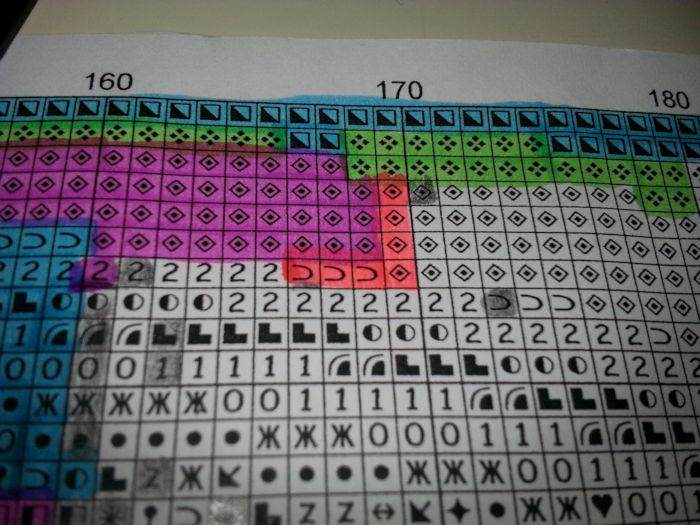
Here you can see my pattern and how I mark it. I’ve stitched those three stitches. I erased the pencil showing the parked tread and now have highlighted it and the stitches after it. I’ve then parked the thread and indicated the location in pencil.
Selecting Thread
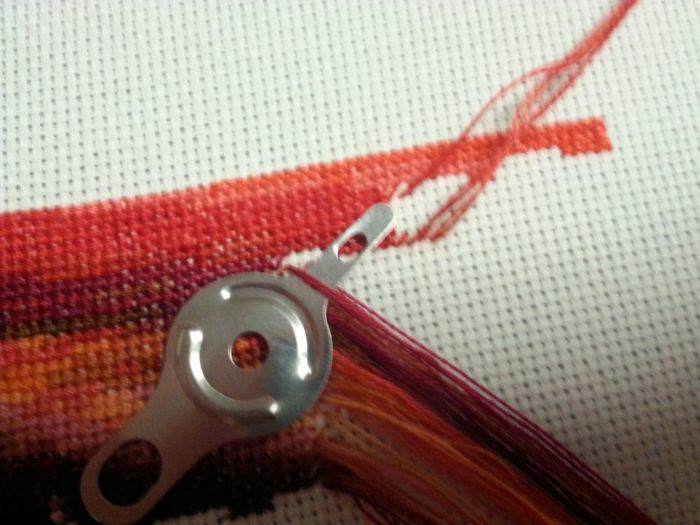
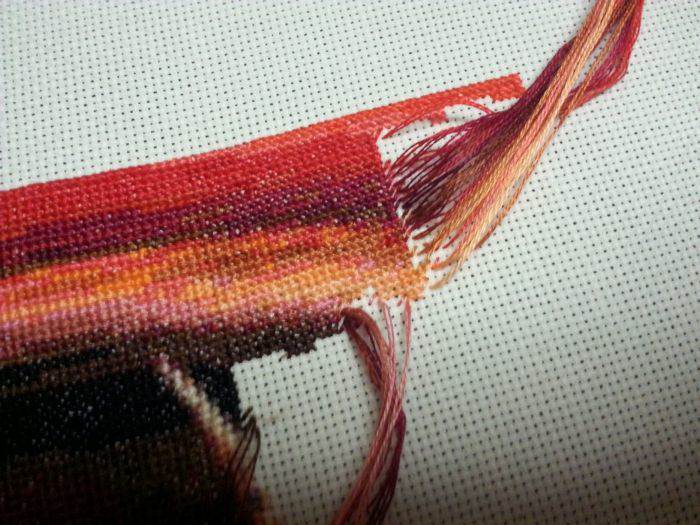
Here I’ve stitched a few more threads and parked them, you can see to the right. Now, I’m selecting another thread. I usually put the needle on my threader and then use the threader to help separate out the piece I want to work with. I stitch with two strands and this is 18 count Aida.
Moving Along
Here is another image of my pattern as I move along down the 170 row. You can see the threads moving to the right and getting parked.
More Done
Tying Off
This color of thread, I’m out of stitches, so I’m tying it off. I don’t have another stitch where I can park it within the area. This is the back of my piece with the needle moving upwards towards me.
Hemistats
This is probably a different lesson, but I love my hemistats. I always double secure my threads before I nip them. I use hemistats to pull the needle through my stitching and it moves it really smoothly and without to much effort. I find that this keeps my stitching smoother and makes tying off strings a breeze. I use size 28 petite needles and they are almost always bent as you can see this one clearly is. I also break about one a week.
Needed Up Top
Here you can see I made a mistake last time I stitched in that I parked my string in the wrong place. I don’t sweat it. You can now see the two stitches at the lower area where I went ahead and unparked a thread prematurely. I finished that stitch and the one below it before moving up to the place where the thread should have been parked. I then did that stitch and moved the thread out to the right and parked it correctly this time.
Parked Too Quick
In this image, you can see. I did the top stitch (the one that is correct, but only stitch on row). I then parked the thread to the right, but next I realized that I still had one stitch to do with that color. Well, no problem. I stitched the one where I had parked it and went back did the one that needed done and reparked it out where the next stitch will be. I’m trying to show you that this method can be versatile and you don’t have to be stressed, stitching is a relaxing hobby.
Changes
Here you can see how I marked those. You can also see the 2 symbol. That is a color that I don’t have a thread parked for it and it’s the only stitch of that symbol around. I stitch that and tie it off after just one stitch.
Continue Parking
Here you can see that we’ve moved down the page and the strings are piling up towards the right and we’re getting less underneath, shortly after this we’re leaving for dinner. Using this method, you can just stop and leave. There is no set place that you need to end and it really is quite organized even though it may look chaotic from afar.
After Today
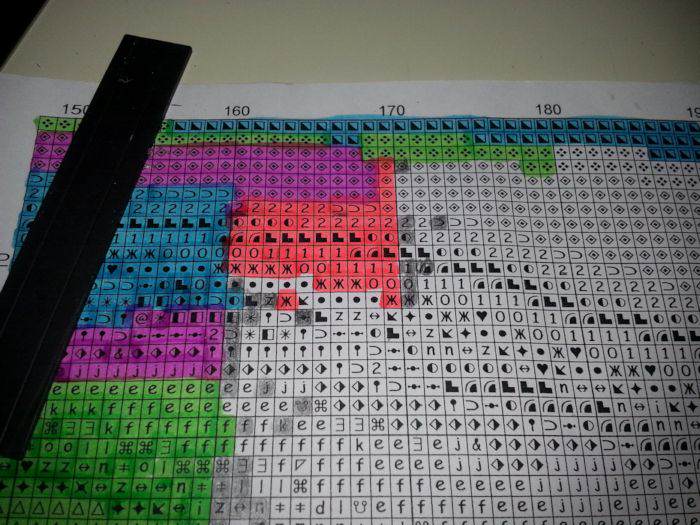
This is where I quit stitching today and how my pattern looks, you can see I’m still moving down in the 170 row, but I’ve moved the 22 of the parked strings to the right and they are now nicely parked in new positions.
I hope this photo tutorial has helped you understand how working the parking method is done. Thank you for your interest, check out some of the various patterns and options that we offer here at Advanced Cross Stitch.